- Product Information
- Product Resources
- Enquire
- Related Products
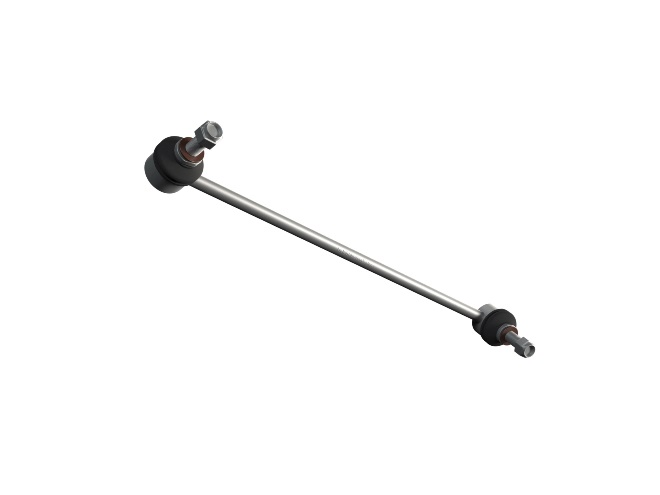
OE design
Delphi link stabilizers come in either steel, aluminium or reinforced plastic as per the OE. The lightweight property of our plastic link stabilizers , helps to reduce weight and dampen vibrations, whereas the corrosion-resistant steel makes for a stronger, longer-lasting part. Whichever material you fit, you can be assured it’s been manufactured to the very latest OE specifications.
Engineered for a stronger, durable part
.jpg?sfvrsn=e723e13c_7)
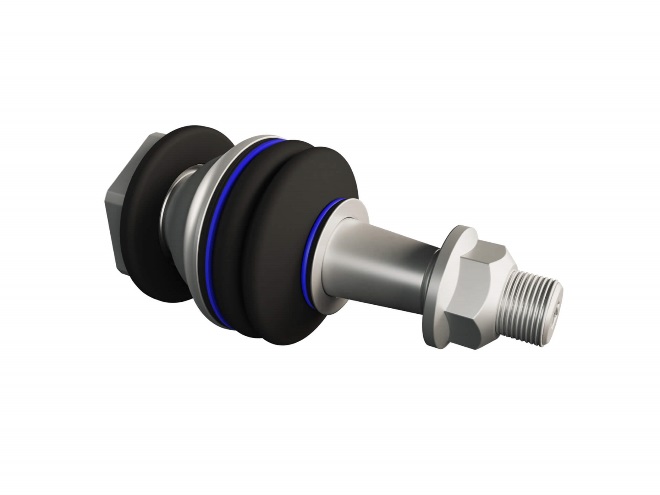
Because they’re subject to extremely high stresses, Delphi link stabilizers feature a larger, surface-hardened steel ball pin, wear-resistant plastic clip-on socket, reinforced link rod and a temperature-resistant, high-performance grease. Together they offer improve load carrying capacity and service life.
Added protection

Given their position, link stabilizers are particularly vulnerable to contamination from dirt and moisture. For reliable protection from this and more, we use sealed, high-grade rubber boots on all our link stabilizers. We also apply an environmentally friendly, water-based cataphoretic coating providing up to 10 years’ corrosion protection.
Rigorous testing
Link stabilizers are subject to massive shock loading, so we conduct tensile strength testing to validate both the product housing and welding strength - applying force through the centre of the housing until breakage occurs. Importantly this is never sooner than the OE.
Our meticulous approach to product development and testing means you can fit Delphi link stabilizers with confidence. But for added peace of mind, they also come with an extended three-year or 36,000-mile warranty.
The Delphi Difference
-
100 years of OE experience, supplier to the world’s top automakers
-
OE heritage and knowledge built into every aftermarket part
-
Comprehensive portfolio for a wide range of vehicles and model years
-
Streamlined SKUs for easy inventory management
-
Support through tools, tips and training

Related product resources and downloads
Resource Highlights
Suspect a possible bad ball joint? Then you’re serving your customer well by being proactive about the repair for such a safety-critical part. Replacing a ball joint won’t be the same process for every vehicle, especially since there are several different kinds of ball joints. In the video below, we’ll take a look at how to replace a press-in ball joint. Specifically, we’re looking at a Honda Civic, which Delphi covers with our part TC1299.
We’ll explain the full process below the video as well.
How can I tell if my customer’s car has a bad ball joint?
We recommend a thorough pre-alignment inspection. Some common signs include:
- Unusual noises
- Instability
- Handling concerns
What should I look for when inspecting a ball joint?
Keep in mind that integrity of the rubber boot is the key. A common problem is that the boot will split, grease will leak out, and cause problems. Generally when inspecting a ball joint, we look for movement outside of manufacturers’ specifications, but with low friction non greaseable joints you should look for seized joints that show no movement.
What tools will I need for a press-in ball joint replacement?
- Ball joint press kit (including C-clamp and adapters)
- Socket, ratchet, torque, and extension wrenches
- Socket air tools
- Ball joint separator (also known as a pickle fork)
- Needle nose pliers
- Screwdrivers
- Tire iron
- Side cutters
- Axle press
- Hammer
- Shop towels
- Rust penetrant
Steps to replace a press-in ball joint
Make sure you follow manufacturers’ recommendations for installation, torque specs, and TSBs where applicable.
Removing the ball joint
- Use side cutters to remove the cotter pin that’s securing the fastening nut.
- Use a socket wrench to remove the fastening nut.
- Use a socket wrench to remove the axle nut.
- Push the axle back through and loosen the knuckle assembly, moving it to gain access to the ball joint.
- Separate the ball joint from the lower control arm with your ball joint separator. You can operate the tool with a socket wrench, using an appropriately sized socket. You will hear a crisp, clear snap when the stud pops loose from the lower control arm.
- Push the axle shaft back through the hub assembly. You may need to use an axle press and a socket wrench to get things started because often the axle can become dry or stuck over time. Make sure you can swing the axle shaft clear and prop it up (perhaps with a piece of wood or a tool). This frees up the lower ball joint.
- Push the outer CV joint back through the hub assembly to loosen it up, but make sure you don’t pull the inner CV joint out of the transmission. You only want to remove the knuckle and assembly.
- Remove the axle press with the socket wrench.
- Remove the knuckle and the strut assembly out so your press can access the ball joint.
- Remove the rubber boot by knocking it off with a hammer and screwdriver. The new ball joint comes with a new boot so you don’t have to worry about protecting the old one. Clean off the exposed ball joint stud with a shop rag.
- Set up your ball joint press. The adapters you’ll need to use are vehicle-specific. The upper and lower cone will fit together on top and bottom of the ball joint.
- Run the press inwards to press out the old ball joint with the socket wrench and ball joint press.
- Remove the top and bottom accessories and remove the old ball joint. If it comes out cleanly with the press, just double check that there are no edges to be concerned about on the steering knuckle, and no hidden damage.
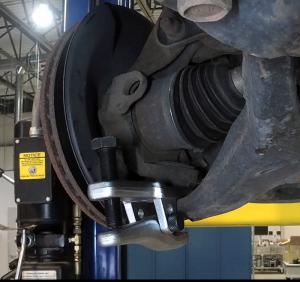 Set up ball joint separator tool. | 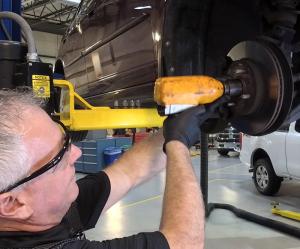 Remove axle nut. |
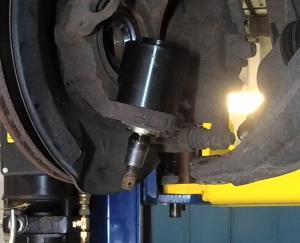 Fit upper adapter onto ball joint. | 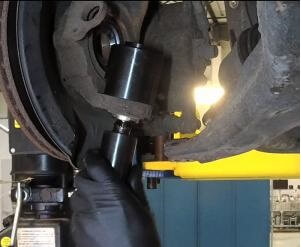 Fit lower adapter onto ball joint. |
Replacing the ball joint
- It’s a good rule of thumb to always check the new and old components side by side to make sure your new part matches the one coming out. Take off the new retaining nut and plastic shipping cover.
- Insert the new ball joint into the knuckle and make sure it’s level.
- The adapters to install the ball joint are different from the ones you used to remove the old one. A small specially designed adapter fits tightly over the upper portion of the ball joint. Fit this on, and place the press on top of the upper adapter.
- The lower adapter fits over the large ball joint screw under the ball joint, with room for the stud and threads so that they won’t get damaged during the installation process.
- Make sure everything is square and true to the knuckle, and wind the press up to tighten it by hand. It’s very important to press the joint in in a level and square manner, with the joint centered and aligned to the knuckle. Wiggle while tightening to make sure everything remains straight.
- Once you are sure you have clearance and everything is safe and secure, use a socket wrench to finish pressing in the ball joint with the press.
- Once the upper mating surface of the joint meets securely with the knuckle, you can remove the press. Make sure that the rubber boot hasn’t been nicked or touched, and that the threads remain safe and undamaged. Check that the ball joint has pressed fully down.
- Begin working the axle shaft back into the wheel bearing. Apply a bit of rust penetrant to help it slide back in properly. Match the splines into the hub.
- Re-secure the knuckle and the new ball joint stud to the lower control arm. Make sure the axle is feeding through properly and starting to poke through the outside of the hub assembly.
- Add the securing nut and tighten with a socket wrench.
- Add the cotter pin.
- Reinstall the axle nut and torque it to manufacturer specifications. If it’s not all the way through, you can grab the outside CV joint to help you.
- Finally, you can safely lower the vehicle to the ground. Finish up the job by taking the vehicle to get an alignment.
Now you’ve done it! A safe and successful press-in ball joint replacement.
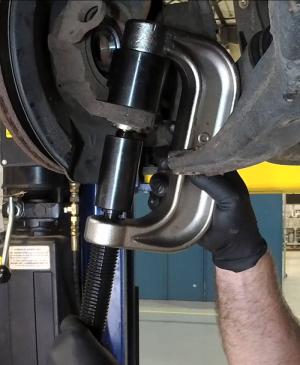 Wind up press. | 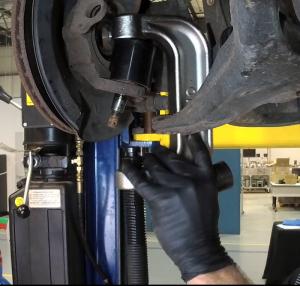 Joint released from knuckle. |
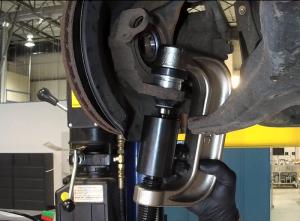 Wind up ball joint press. | 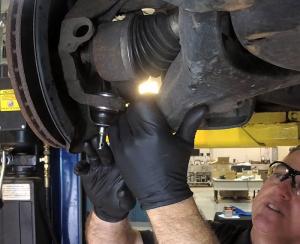 Resecure ball joint stud to control arm. |
Do I need a retaining clip?
For this unit TC1299 there is no need for a retaining clip (or snap ring). There was no retaining clip in the OE unit and the Delphi OE design is exactly the same, so a clip is not necessary. The new part comes with a cotter pin and the nut for a complete installation.
How many times can I replace a ball joint on the same vehicle?
Follow manufacturer recommendations. For this part, TC1299, only one replacement opportunity is possible per the OE. If the joint needs to be replaced again, the OE recommends purchasing a new knuckle and ball joint, and replacing both.
A few safety tips:
- It’s important to use a proper ball joint press. In the past, ball joints could be punched or hammered out, but this is no longer best practice.
- Make sure you have room to work. The ball joint press needs a certain amount of space, so it’s preferable to use a hoist. If you’re working on the ground with axle stands, make sure you have enough clearance on the ground.

Visit our Technician Library for access to Documents and Downloads
Get in touch
Find out where to buy Delphi parts