Fuel Modules and Pumps

- Product Information
- Product Resources
- Enquire
- Related Products
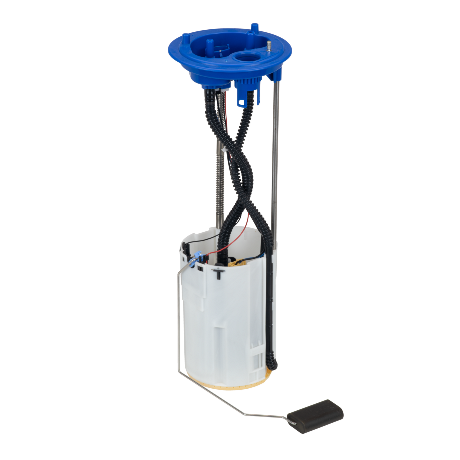
Distinctly Delphi Fuel Pumps
- Anodized aluminum can reduce flow loss by up to 100% in severe contamination
- New carbon commutator extends fuel pump life by up to 300% over commonly used copper commutators by reducing oxidation and premature wear*
- Over-molded armature protects pump windings in corrosive environments
- Button style contacts feature additional wear material that can last for over 1 million cycles
- High capacity synthetic mesh inlet filter is able to filter out all items larger than 30 microns
- Distinctly Delphi with an electric blue fuel pump top, module top cover and strainer material
*In contaminated fuel or fuel with alcohol blends
| Delphi part number | Popular Applications | EMEA car parc |
| FG1455-12B1 | AUDI A1/A1 Sportback/S1 Quattro/S1 Sportback Quattro, SEAT Ibiza/Ibiza SC/Ibiza ST/Toledo, SKODA Fabia/Fabia Scout/Rapid/Rapid Spaceback/Roomster/Roomster Praktik/Roomster Scout, VW Polo | 12.4M |
| FG0989-12B1 | AUDI A3/A3 Cabrio/A3 Quattro/A3 Sportback/A3 Sportback Quattro, SEAT Altea/Altea Freetrack/Altea XL/Leon/Toledo, SKODA Laura/Octavia/Octavia Scout/Yeti, VW Beetle/Bora (Jetta)/Eos/Golf/Golf Cabrio/Golf Estate/Variant/Golf Plus/Golf Van (Variant)/Jetta/Jetta Wagon/Scirocco | 9.2M |
| FG1061-12B1 | ABARTH 500/500C/595/595C/695, FIAT 500/500C/500S/Panda/Panda Classic/Panda Van | 8.9M |
| FG1070-12B1 | AUDI A3/A3 Quattro, SEAT Leon/Toledo, SKODA Octavia/Roomster/Roomster Praktik/Roomster Scout, VW Bora/Bora Estate/Variant/Cabrio/Golf/Golf Cabrio/Golf Estate/Variant/Golf Van (Variant)/Jetta/Jetta Wagon/New Beetle | 5.6M |
| FG1498-12B1 | CITROËN C1, PEUGEOT 107/108, TOYOTA Aygo | 5.3M |
.tmb-660w.jpg?Culture=en-GB&sfvrsn=a9375dbb_1)


The Delphi Difference
-
100 years of OE experience, supplier to the world’s top automakers
-
OE heritage and knowledge built into every aftermarket part
-
Comprehensive portfolio for a wide range of vehicles and model years
-
Streamlined SKUs for easy inventory management
-
Support through tools, tips and training

Related product resources and downloads

Resource Highlights
In this article you will find out about everything you need to know in order to do a safe and thorough fuel tank cleaning.
Safety First | We always put safety first, so make sure you’re thorough and careful. Don’t forget to wear safety glasses and gloves. Give yourself room to work and have cleanup materials ready to clean any spills immediately. Work in a well-ventilated area away from an open flame or anything that could cause a spark or ignite fuel, such as pilot lights and incandescent light bulbs. Make sure you have a fire extinguisher on hand. Don’t smoke, either. Always relieve fuel pressure prior to opening fuel systems because releasing fuel under pressure can cause fire and injury. Store fuel in an approved container like a gas caddy or gas can. |
Start with a drained tank removed from the vehicle | You’ll need to start with a drained tank removed from the vehicle. Clean off any rust or road debris from the top of the tank before you remove the pump. This is to ensure that no additional dirt gets into the tank while you’re trying to clean it. You can use a shop vacuum or wipe the tank down with a damp, lint-free towel and then blow it dry with compressed air. Be sure to protect your eyes. |
Remove the fuel pump | Remove the fuel pump from the tank and then carefully pour out any remaining fuel and debris into your approved container. After that, you should swirl around the fuel tank in a circular motion. This helps you collect any fuel or other debris that’s still stuck inside. |
Clean the inside of the tank | The next step is to simply use dish soap and water to clean the inside of the tank, and pour it out when you’re done. Use another lint-free towel to wipe out the inside of the tank, and then you can use an air hose with compressed air to further dry out the tank. |
Visual Inspection | Once your tank is clean and dry, do a visual inspection. If there are any signs of rust or other damage inside the tank, you may need to replace the tank. You should also check inside the fuel module bucket for any signs of contamination there, just in case that’s where the real problem is. |
Let the fuel tank dry | Now let the tank sit for at least another thirty minutes to make sure it’s dry, and you’re done. Taking the time to properly clean the tank gives you the peace of mind that your repair is done right, and that old debris won’t damage any brand new parts that you may need to install. |

Visit our Technician Library for access to Documents and Downloads
Get in touch
The full Delphi Fuel Management product range

Find out where to buy Delphi parts
