- Product Information
- Product Resources
- Enquire
- Related Products
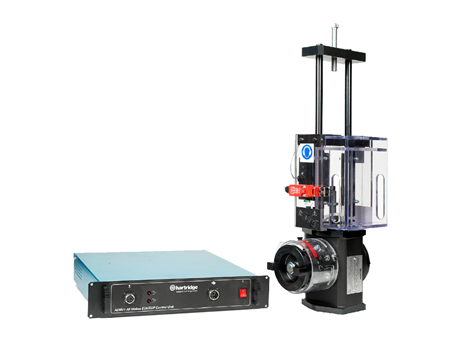
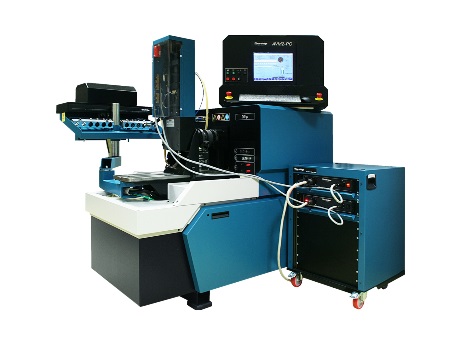
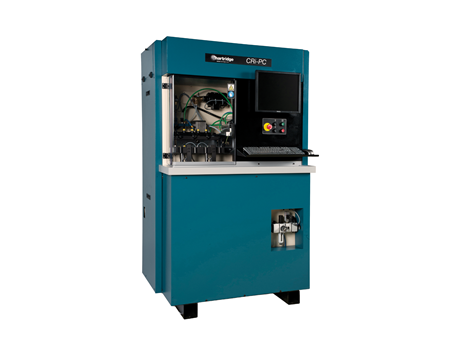
HK1400 Universal Test Bench
The HK1400 is designed to bridge the gap between OEM approved EUI/EUP repair workshops and the general diesel EUI/EUP repair market.
The HK1400 has been engineered so that there is no compromise on accuracy and repeatability of test results, yet the solution has to be affordable for all progressive diesel workshops worldwide. By utilizing and adapting our existing magmah software and keeping development costs to a minimum, it has enabled us to focus on the engineering of the hardware to ensure you get the best there is.
Contact your local Central Distributor for purchase details.
Hartridge Test Plan Database
Test plan database includes coverage for Denso®, Delphi®, Cummins®, and more….
All the testplans, where applicable, include response time limits and they have all been extensively validated to ensure accuracy and to enable workshops to test EUI/EUP to the highest possible standards.
Key EUI/EUP Test Functionality
- Response time measurement
- Electrical resistance
- Fully configurable pulse widths
- Injected quantity shot count
- Automatic test limits generator
- Printable test results and analysis
The Delphi Difference
-
100 years of OE experience, supplier to the world’s top automakers
-
OE heritage and knowledge built into every aftermarket part
-
Comprehensive portfolio for a wide range of vehicles and model years
-
Streamlined SKUs for easy inventory management
-
Support through tools, tips and training

Related product resources and downloads

Resource Highlights
When replacing a fuel pump in a vehicle, it’s also important to replace the strainer because it can affect the pump’s performance. It’s also essential to replace the strainer correctly – if it’s not installed right, then it can cause the pump to prematurely fail. This guide takes you through the whole replacement process, step by step.
The role of the pump strainer
The pump strainer is a filter of fine mesh that sits over the fuel pick-up tube. Essentially, it keeps out anything that could contaminate the fuel system, such as dirt, sediment, fuel deposits, rust particles, sand, etc.
Without this filtration, the fuel pump can easily get damaged. With sediment clogging the system, the fuel pump would have to work much harder. Additionally, the fuel can get contaminated and dirty, which can cause further faults to occur in the fuel injectors.
Signs and symptoms of a bad fuel strainer
If the vehicle’s fuel strainer is damaged, the vehicle may display the following signs. It’s worth noting that many of these symptoms can point to other fuel system faults, such as an issue with fuel injection. In a nutshell, they all point to the vehicle not getting the correct amount or mixture of fuel.
- Reduced engine power
- Difficulty starting the engine
- Engine stalling after running for a while
- Loud noises from the fuel pump area
- ECU check engine light
Fuel pump strainer replacement guide
Follow along with these steps to replace the fuel pump strainer correctly.
Tools and materials needed
For this procedure you’ll need:
- New strainer
- Socket wrench
- Fuel line removal tool – not essential, but comes in handy
- Safety glasses and gloves
Cleaning cloth
Safety precautions
Replacing a fuel pump strainer is straightforward in some vehicles, but others require the tank to be dropped, which can be more complicated. Either way, when working with fuel and flammable materials, it’s important to follow safety procedures.
- Ensure the vehicle is off and the battery disconnected to prevent any electrical accidents
- Wear appropriate safety gear
- Have a fire extinguisher nearby
- Use approved containers to catch fuel spills
Step by step process
Preparation
Ensure the vehicle is parked on a flat surface, in neutral with the handbrake on. Locate the car fuse box and remove the fuel pump fuse box or relay. Then, start the engine and leave it to run for a few minutes, then switch off to depressurise the fuel lines.
Access the fuel pump strainer
Firstly, you’ll need to locate the fuel strainer. This will be found in the fuel tank of the vehicle. It’s likely to be behind an inspection cover or panel, which you’ll have to remove. Next, place an approved container beneath the fuel pump to catch any fuel spillages when you remove the unit.
Remove the old strainer
Pull away the strainer cover by releasing its fastener. It’s a good idea here to clean around the strainer and fuel lines with your cleaning cloth. Now it’s time to remove the strainer. Gently twist and pull, and allow the excess fuel to drain.
Install a new strainer
With the old strainer removed, it’s time to clean in and around the strainer head so that all dirt build up is gone before fitting the new strainer. Once ready, simply screw it into place.
Final safety checks
Make sure any fuel pipes are reconnected, then it’s time to test the vehicle. Start the car and look closely to check for any leaks. Then replace the inspection cover, making sure it is secured properly.

Visit our Technician Library for access to Documents and Downloads
Get in touch


Find out where to buy Delphi parts