Resource Highlights
In this article you will find out about how to analyze a failed fuel pump. We take you through different checkpoints to find the fault.

What can a failed part tell you? A lot... It tells a story. Take the following fuel pumps shown. These failed pumps were not a result of incorrect testing. All tests performed were valid and provided useful data for making a diagnosis, but more could have been learned. Were they worn out or did they fail for another reason?
The answers to these questions are important and without them, an accurate diagnosis is left to chance, inviting future problems for you and your customer. A failed-part analysis should always be conducted on failed fuel modules through close visual examination and some simple disassembly. Avoid a potential customer comeback with these simple steps.
First Checkpoint | Examine the electrical connectors closely and look for evidence of terminal overheating, especially at the terminals supplying current flow to the fuel pump inside the module. Badly charred and burnt terminals are easy to spot, but seemingly undamaged connections should be checked more closely for evidence of melting or bubbling near the electrical terminals. Any melting is an indication of excessive heating due to a poor electrical connection caused by a damaged vehicle body harness. If this type of damage is found, poor pump performance will occur due to this bad connection. The vehicle’s electrical connector must be replaced or repeat failures will occur. |
Second Checkpoint | Examine the external strainer on the fuel module. Look for signs of dirt and/or rust contamination. Any form of dirt found in the strainer should immediately trigger an inspection of the fuel tank. A tank cleaning or replacement should be conducted, based on what is found. It is important to understand how contamination entered the fuel tank so preventative action can be taken to eliminate future occurrences. Areas like the tank vent system should be checked to determine if contaminants entered through this area. If determined contaminants were “pumped” into the tank or intentionally added, it’s important to change fuel supplies or add a locking gas cap to the vehicle. |
Third Checkpoint | Visually examine the fuel module bucket and internal strainer. Depending on the module design, you may be able to view the module bucket through an opening in the fuel module design. If not, the bucket may have to be removed from the fuel module through disassembly. What is important to note is what has accumulated in the fuel module bucket and internal pump strainer. Contaminants entering the fuel module bucket are indefinitely trapped, so the bucket will contain a contamination history of the fuel module. A significant amount of contamination found in the bucket and internal strainer is a sure sign that the part failed due to contamination. This indicates there are other issues on the vehicle that need repair prior to the installation of a new fuel module. |
Analysis of Actual Failures | These are actual scenarios showing failed modules. Since these issues were not identified during the initial diagnosis, the results were repeat failures. Upon such closer inspection, all the needed repairs could have been made. More important, a customer “comeback” would have been avoided. |
Intermittent Starts Due to Bad Vehicle Wiring | This vehicle received three fuel modules over a five week time period. In each instance the vehicle would not start. Sometimes striking the bottom of the fuel tank would cause it to run. All modules were analyzed and failed due to a bad vehicle electrical connector, which had not been replaced in all instances. All three modules were damaged via a burnt fuel pump ground terminal. Although damage is not extreme, it is significant enough to create repeat failures.
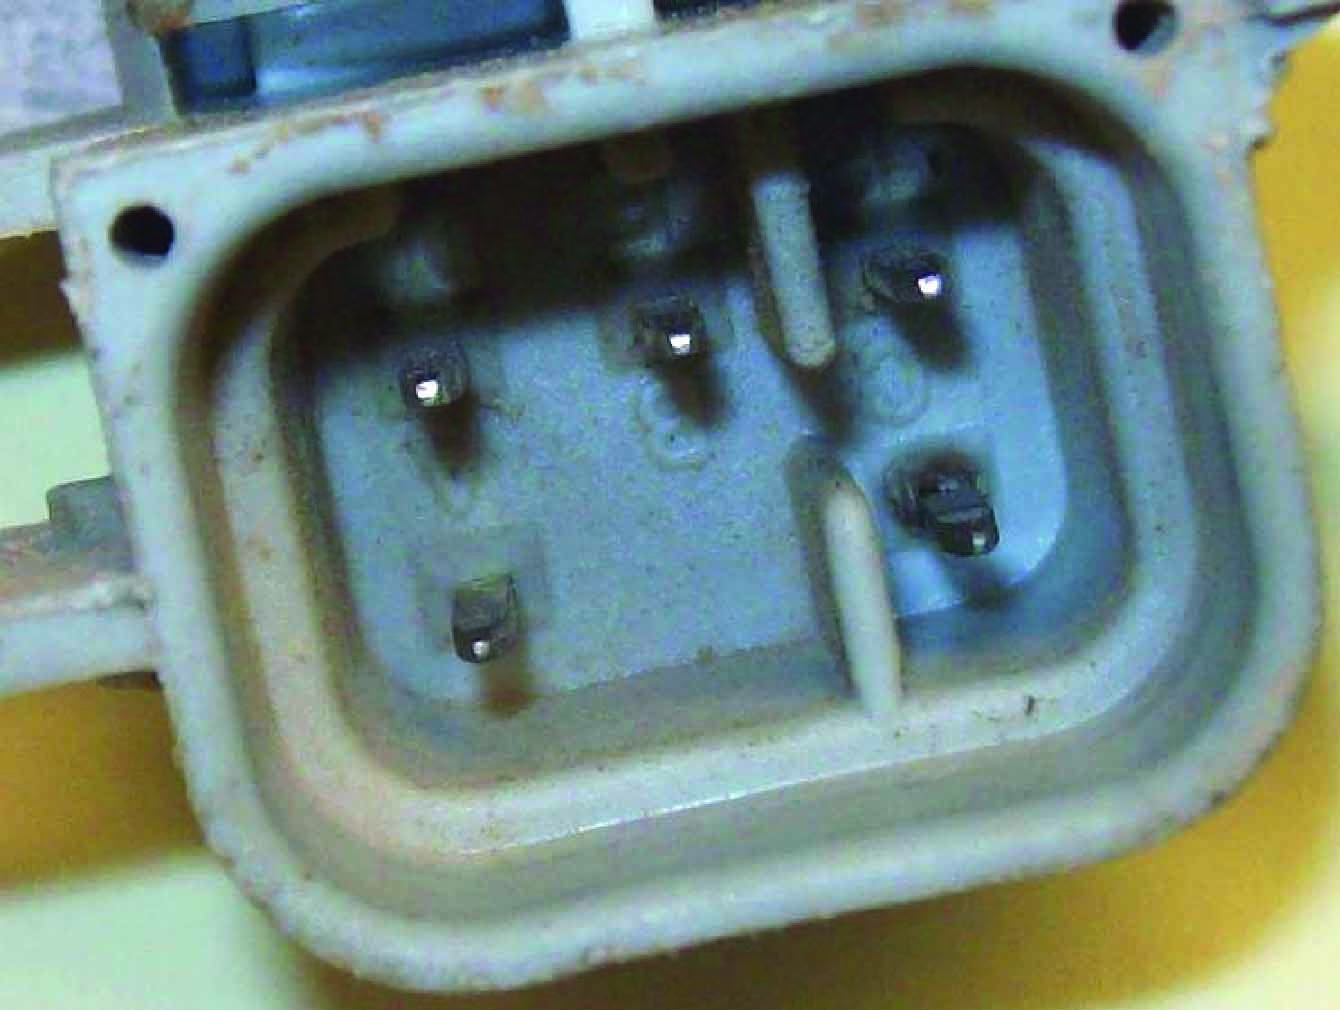
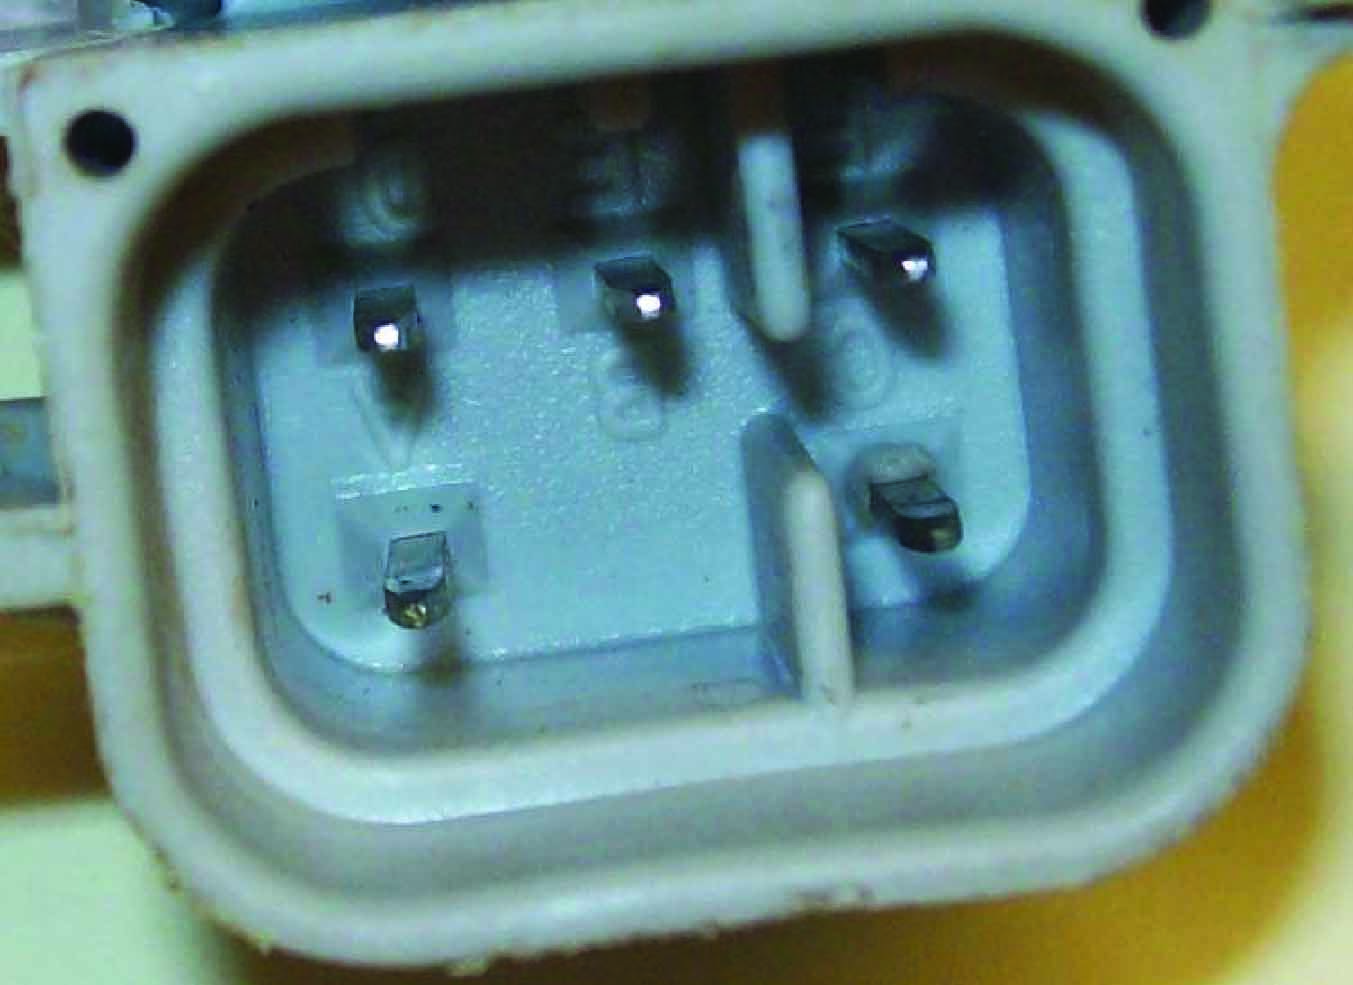
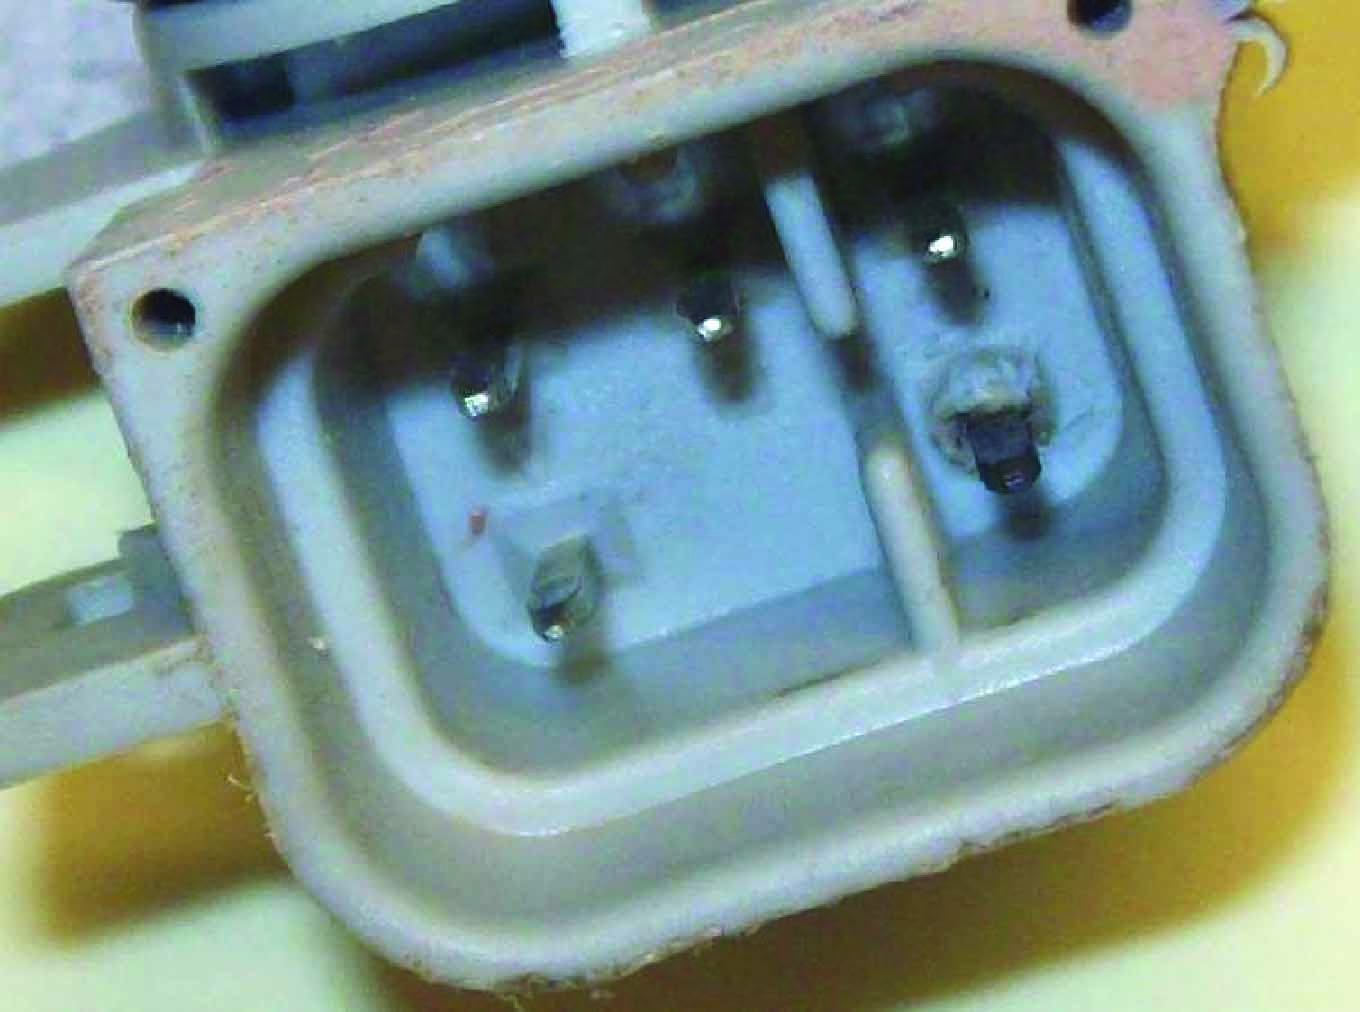 All three modules failed due to a burnt “C” terminal, the ground path for the fuel pump. |
Contamination Caused by Rusted Fuel Lines | On both parts, rust was found inside the bucket and on the pump strainer. External strainers of both parts show discoloration, but very little rust contamination. This vehicle received two fuel modules in less than a week. The reported issue was noisy operation and erratic fuel pressure. Both modules were analyzed, and found to have the fuel module bucket and internal strainer heavily contaminated with rust. The external strainers showed some discoloration, but had significantly less rust in them. The cause was a rusted return fuel line. No significant amount of rust or contamination was found in the fuel tank because the source of the rust was the metal return line on the vehicle. The rust that was deposited went directly into the fuel module bucket, as the return line on this vehicle puts fuel directly into the fuel module bucket, not the fuel tank. Once the rust was deposited, it could not be removed. The fuel filter was not able to catch the rust because it was developing in the vehicle return line, downstream of the fuel filter. Part One  Part Two  External strainers of both parts show discoloration, but very little rust contamination. |
Part One | 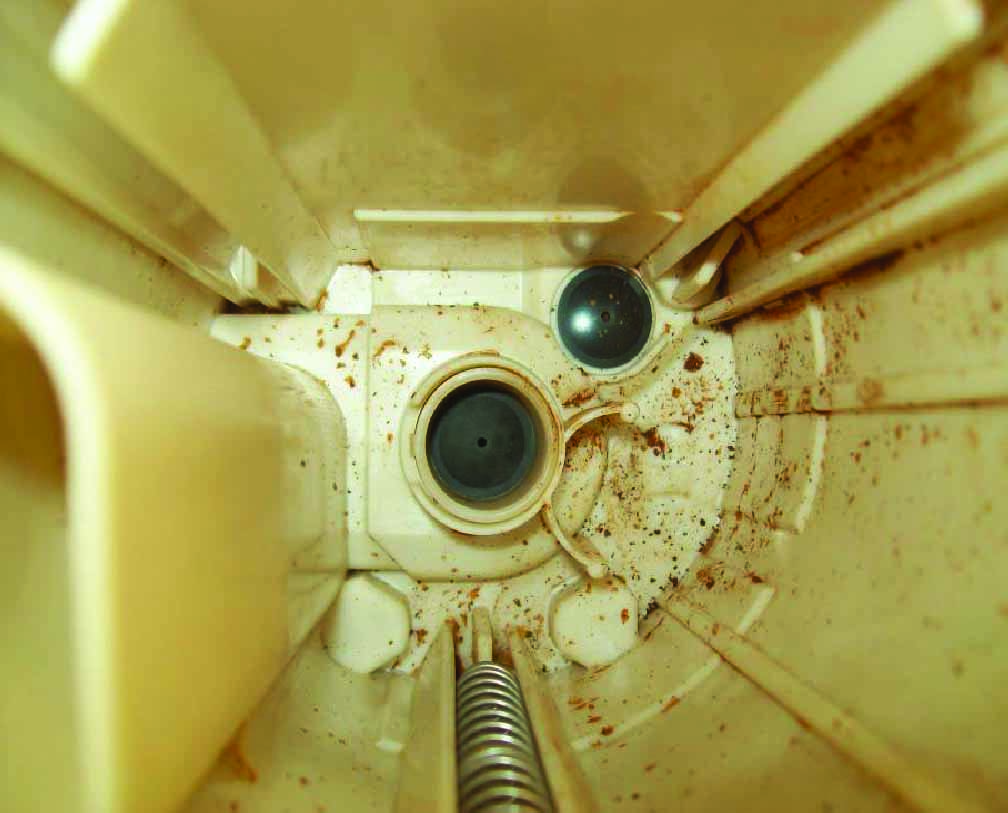 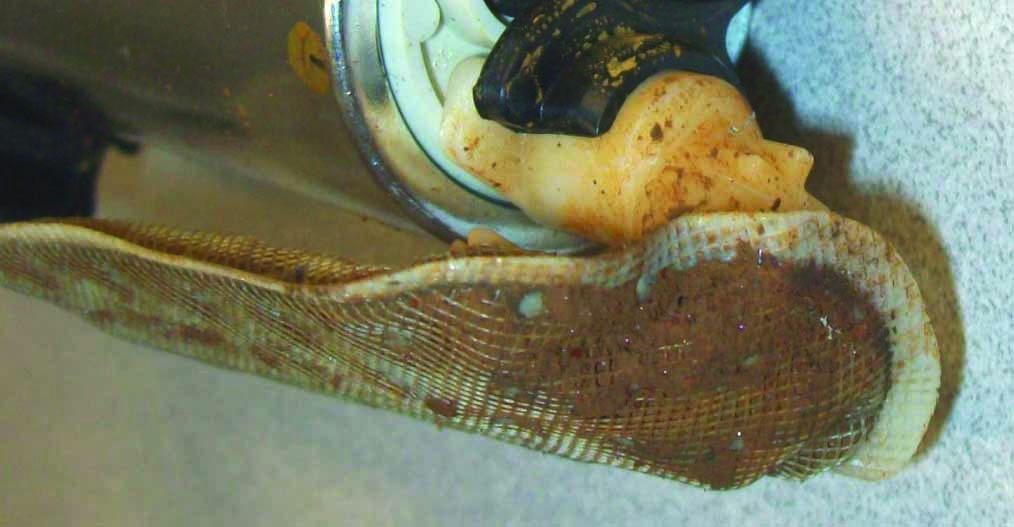 |
Part Two | 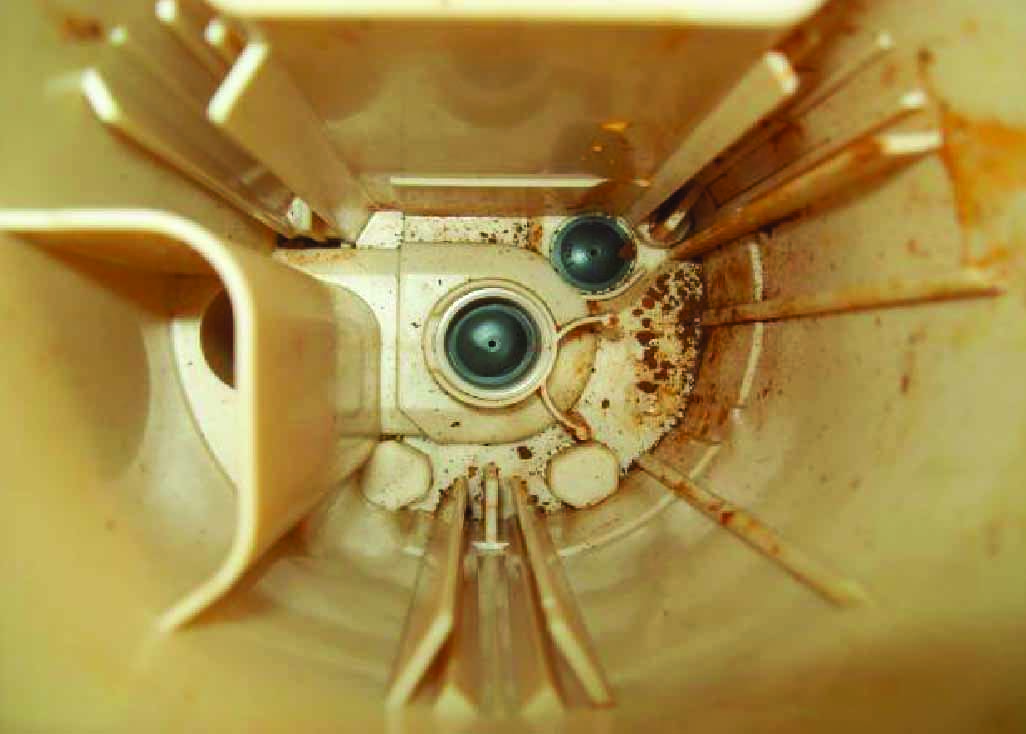 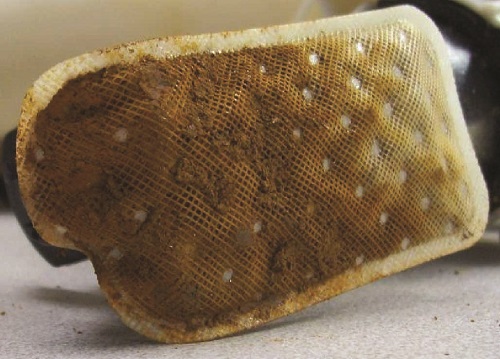 On both parts, rust was found inside the bucket and on the pump strainer. |
SIGN UP TO FIND MORE
Fill up your details to hear more from our experts and get the latest updates from Delphi.

Diagnostics
Discover our extensive range of OE-level diagnostic and test equipment for quicker, more accurate servicing and repairs.

Training
Choose from our expert-led, accredited training courses to enhance your skills and prepare you for the vehicles of tomorrow.
Find out where to buy Delphi parts